CSS content 속성
CSS content 속성은 title 속성처럼 속성값에 삽입된 텍스트나 이미지 등을 화면에 출력시킵니다. CSS 효과이기 때문에 의미론적 웹은 아니므로 검색엔진에는 검색되지 않는 디자인 요소로 취급됩니다.
본문코드
<h1> 태그에 안녕하세요! 라는 텍스트를 삽입시켰습니다.
<html>
  <head>
    <style>
      h1 {
        content : "안녕하세요!";
      }
    </style>
  </head>
  <body>
    <h1>Hello World!</h1>
  </body>
</html>
결과

하지만 위 코드를 실행해보면 아무런 변화가 없습니다.
왜냐하면 어느곳에 content 속성을 삽입할지 위치를 지정하지 않았기 때문입니다. 그래서 content 속성은 대부분 :before 또는 :after 가상클래스와 같이 사용됩니다.
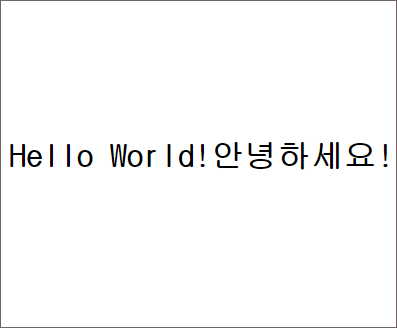
CSS :after content
content에 삽입된 데이터를 태그 뒤에 삽입하고 싶으면 css 선택자 지정시 :after를 붙이면 됩니다. 어떤 태그에 :after가 붙으면 해당 태그의 뒷 공간을 선택자로 지정하게 됩니다.
본문코드
<html>
  <head>
    <style>
      h1:after {
        content : "안녕하세요!";
      }
    </style>
  </head>
  <body>
    <h1>Hello World!</h1>
  </body>
</html>
결과
<h1> 태그 뒤에 content에 삽입된 텍스트가 삽입되었습니다. 단 CSS 효과이기 때문에 검색엔진 등에서는 검색되지 않는 디자인 요소로 간주됩니다.
CSS :before content
content에 삽입된 데이터를 태그 앞에 삽입하고 싶으면 css 선택자 지정시 :before를 붙이면 됩니다. 어떤 태그에 :before가 붙으면 해당 태그의 앞 공간을 선택자로 지정하게 됩니다.
본문코드
<html>
  <head>
    <style>
      h1:before {
        content : "안녕하세요!";
      }
    </style>
  </head>
  <body>
    <h1>Hello World!</h1>
  </body>
</html>
결과
<h1> 태그 앞에 content에 삽입된 텍스트가 삽입되었습니다.

CSS content 이미지 삽입
content 속성에는 이미지 파일도 삽입할 수 있습니다.
content: url(“이미지 주소”);
본문코드
<html>
  <head>
    <style>
      h1:after {
        content:url("https://dasima.xyz/wp-content/uploads/2018/10/css-background-image-ex-3.png");
      }
    </style>
  </head>
  <body>
    <h1>Hello World!</h1>
  </body>
</html>
결과

CSS content 이미지 사이즈 조절
content 속성에서는 이미지 사이즈 조절이 불가능합니다. 따라서 사이즈 조절을 하고 싶다면 content가 아닌 backgroud-image 속성을 사용해야 합니다.
본문코드
background-size 속성은 이미지의 크기를 결정합니다. width 및 height 속성은 content 영역이 차지할 공간의 크기를 결정합니다.
<html>
  <head>
    <style>
      h1:after {
        content:"";
        background-image: url("https://dasima.xyz/wp-content/uploads/2018/10/css-background-image-ex-3.png");
        background-size:100px 100px;
        width:100px;
        height:100px;
        display:inline-block;
      }
    </style>
  </head>
  <body>
    <h1>Hello World!</h1>
  </body>
</html>
결과

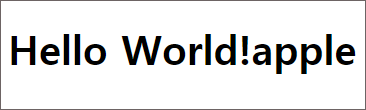
CSS content attr
content attr은 지정한 속성값을 출력합니다.
본문코드
<h1> 태그에 class명으로 apple을 지정했습니다.
<html>
  <head>
    <style>
      h1:after {
        content: attr(class);
      }
    </style>
  </head>
  <body>
    <h1 class="apple">Hello World!</h1>
  </body>
</html>
결과
attr 속성값을 사용하면 <h1> 태그의 클래스명인 apple이 출력됩니다.
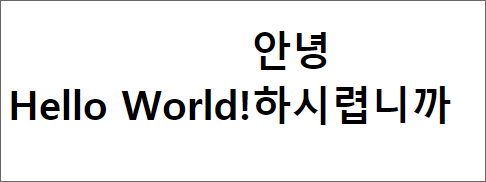
CSS content 줄바꿈
:after 또는 :before와 사용된 content 속성에 삽입된 속성값을 줄바꿈 하기 위해서는 \A 및 white-space: pre 속성값을 사용하면 됩니다. 줄바꿈 될 곳에 \A를 넣고, 속성값에 white-space: pre를 추가해주면 됩니다.
content : "안녕 \A 하시렵니까?"
white-space: pre;
본문코드
경우에 따라서 display를 inline-block 요소를 적절히 삽입해줍니다.
<html>
  <head>
    <style>
      h1:after {
        content: "안녕\A하시렵니까";
        white-space: pre;
        display:inline-block;
      }
    </style>
  </head>
  <body>
    <h1>Hello World!</h1>
  </body>
</html>
결과
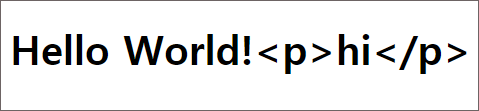
CSS content HTML 태그 삽입
content 속성은 css입니다. 마크업이 아닙니다 따라서 HTML 태그를 텍스트 처럼 삽입하는 것은 불가능합니다.
본문코드
<html>
  <head>
    <style>
      h1:after {
        content: "<p>hi</p>";
      }
    </style>
  </head>
  <body>
    <h1>Hello World!</h1>
  </body>
</html>
결과
<p>hi</p> 태그 요소를 삽입했지만 태그는 작동하지 않고, 텍스트 자체가 출력됩니다. 따라서 content 속성에는 HTML 태그를 삽입할 수 없습니다.